Let’s go!
1 - HTTP Post requests
Choosing between HTTP GET and HTTP POST can be a bit tricky. POST is generally used when you need to send big amounts of data or sensitive information to the server. Unlike GET, data sent with POST doesn't show up in the URL. This offers a bit more security, because URLs can be saved by your browser or pop up in autocomplete suggestions later on.
Data sent via GET might be stored like this, which isn’t ideal for private info. POST also stops people from peeking at your data by looking over your shoulder, a common concern with sensitive fields like passwords, which typically show up as asterisks or dots in the input field to hide them. If you used GET, these passwords would be visible right in the URL.
Although our current search query isn’t super private or lengthy, let’s explore how we might set this up using POST. If you’re eager to just move on with our Headlines app, you can skip this part, but we’ll be using POST in future projects without going into much detail. After showing how POST works, we’ll switch back to using GET for our app, as it’s a better fit for what we’re doing right now.
2 - Add Post routes in flask
To switch to a POST request, we just need to tweak our Python and HTML code a bit. Let’s start with the changes in the headlines.py file:
Change
request.args.gettorequest.form.getChange
@app.route("/")to@app.route("/", methods=['GET', 'POST'])
The first tweak is because we’re now getting user data from a form, and Flask handles this with request.form. This is similar to how request.args works for GET requests, but request.form is for data sent via POST requests.
The second adjustment might not be as straightforward. Up to now, we haven't really talked about how route decorators can specify which types of requests they accept—like GET or POST. By default, Flask routes only accept GET requests. But now, we want our homepage to handle both: GET, for when someone just lands on the page and we show them BBC news by default, and POST, for when they submit the form with their choice of news source. We do this by adding a methods parameter to our route decorator, where we list the types of requests allowed for that route.
3 - HTML with POST
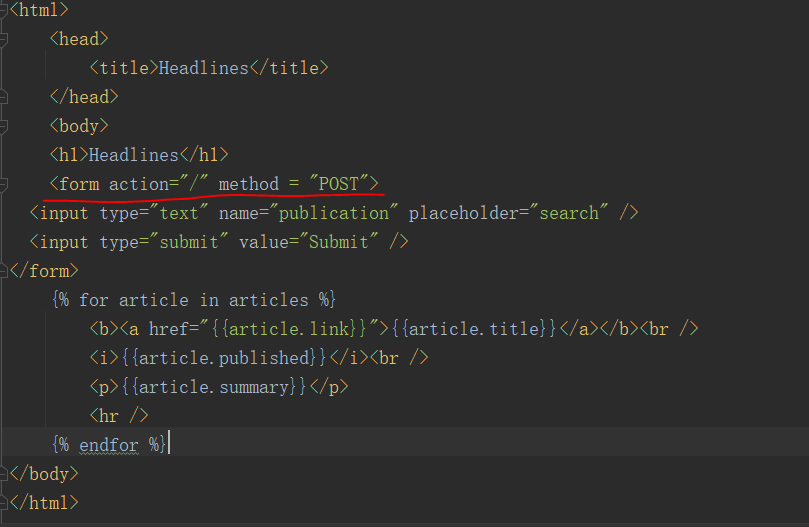
We also need to update our template a bit to match these changes. Just tweak the opening <form> tag in the home.html file to look like this:
<form action="/" method="POST">Just like Flask defaults to GET for form submissions, HTML forms do too. To switch to POST, we need to explicitly set the form’s method to POST. The action attribute isn't always needed, but it's often used when redirecting users after they submit a form, like to a confirmation page. Here, we're specifying that after submitting the form, the user should stay on the same page.
After you update the Python and HTML files, refresh your browser to see the new setup. The main change is that now, when you submit the form, the data won't appear in the URL, making things look neater. However, for our specific needs, this isn't ideal. For instance, we want users' browsers to remember their searches and help auto-complete them next time they visit. Plus, it's handy for users to share links directly to specific queries.
Imagine a user, Bob, finds some cool headlines after searching for CNN and wants to share these with another user, Jane. Instead of having Bob tell Jane to go to our site and type "CNN", it would be much easier if Bob could just send Jane a link like example.com/?publication=cnn. Jane could click on it and see the same headlines right away, assuming the news hasn’t changed. This scenario shows why sticking with GET might be better for our application's goals.


